7+1 relays via the internet

Home Automation ESPeriment
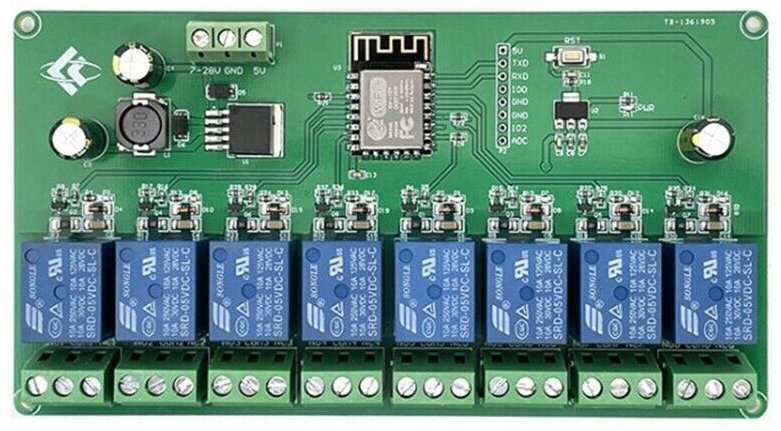
I describe my home automation experiment, done with the usual ESP8266, mounted on a relay board. This system which I have called ESP WEB CONTROL, allows you to activate/deactivate 7+1 relays via the internet, from a PC, tablet or smartphone.The relay+ESP card is available on major e-commerce sites; it must :
_ be connected to a WiFi Router
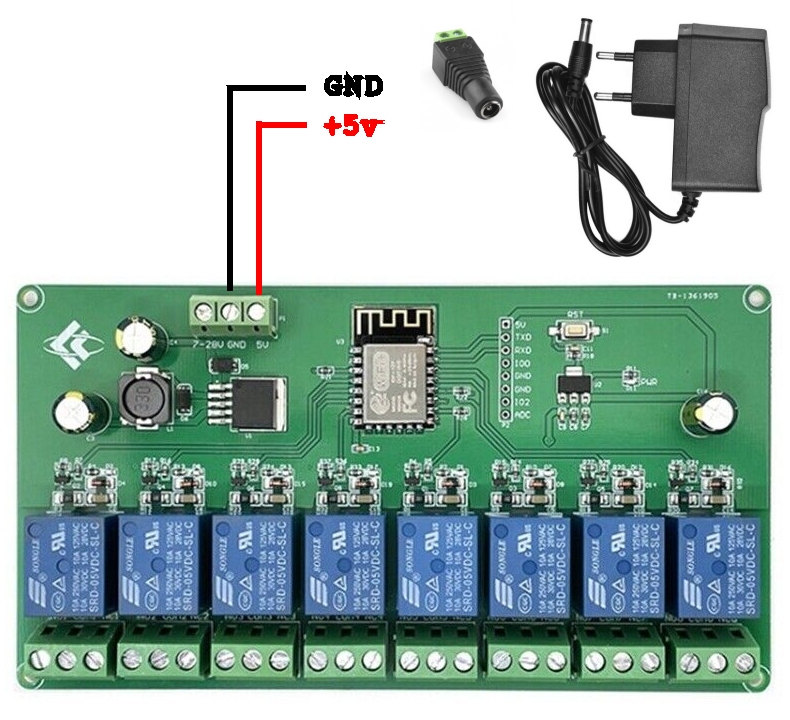
_ be powered by 5v DC, 1 Amp. or higher
_ you must connect to a WiFi router, of which you need to know the SSID and PASSWORD.
To set/change the router parameters it is necessary to have a USB-TTL converter as the board does not have the USB chip on board, but I used an Arduino board (UNO, NANO, MEGA), keeping the CPU blocked with the reset pin to gnd, and using the USB chip to program the ESP.
I have set up a small service menu to be able to carry out the essential operations, such as changing the SSID, password, and other useful things.
Here are the instructions for doing this:
Create the diagram as picture at end of page (Arduino with RESET permanently connected to GND)
- Power the ESP relay board
- Connect the Arduino USB to the PC
- Launch Arduino IDE 1.8
- From IDE select the com port with Tools->Port-> indicating the com port connected to the Arduino
- Select Tools->Serial Monitor
- Set a Baud Rate of 115200
at the bottom right - Reset the relay board (RST button) and within 10 seconds (while the blue LED double blinks) send an ENTER key to enter the Menu
It is essential to carry out these operations:
- 1) set the SSID name of the WiFi Router
- 2) set the WiFi Router password
- 0) Reset the card and test the connection
OTHER OPTIONAL COMMANDS PRESENT ON THE MENU'
- 3) Board Num is assigned on the database, to make multiple boards work at the same time
- 4) Interval is set at 5 seconds, it is the pause time between one update and the next, leave 5 seconds to avoid overloading the server and not being banned by the provider
- 5) SysPass is a number that must be the same on the database, for connection security
- 6) UrlServer is the address where the SQL
database resides - 7) Shows the current set parameters
- 8) It is only for testing the watchdog, command for the developer
- 9) Erase EEPROM, deletes all parameters, nothing will work anymore.
- 10) WiFi scanner, to check if WiFi is active and read the SSID
Meaning of the BLUE
- Double flashing: board reset, 10 seconds to enter the service menu
- Fast flashing: waiting to connect to the WiFi Router, Relay 6 active as local alarm no connection
- Steady on, turns off for a moment every 5 seconds: card connected to the WiFi router, turns off every time it updates the status of the relays. Relay 6 should be at rest, unless it is deliberately activated by the mobile phone.
Here is the explanation of Relay 6 reserved
Relay 6 has an automatic function: when the card is not connected to the WiFi Router the relay is active.
This function is useful for turning on a warning light or sounding a buzzer, or for activating an emergency load that must be turned on if the connection is missing, such as a service light.
If the connection is present, Relay 6 assumes the state decided on the control panel, typically off if used as an alarm.
Mobile client
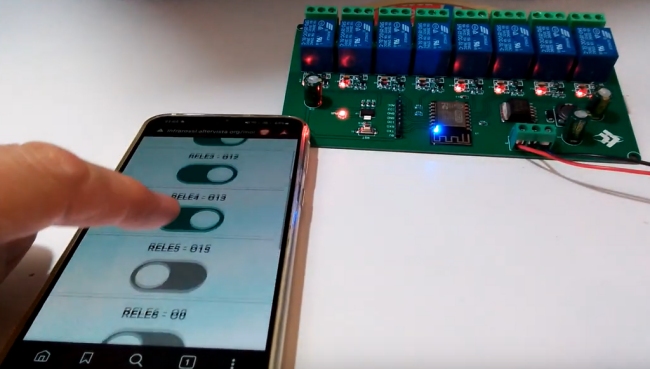
It is possible to connect to the database to operate the relays from any internet browser, PC, Tablet, or Smartphone.
The advice is to install a browser on your smartphone to be used only for this function, and put the site address as the home page, in order to have a dedicated APP in all respects. I recommend BRAVE, downloadable from Google Play
HOW DOES THE SYSTEM WORK?
Brief explanation: an internet server (free or paid) has some service PHP files, filtered by access password.
There is an SQL DATABASE that stores the status of the 8 relays of each card, its ID, etc. etc.
When we log in from the smartphone we see 8 switches, which tell us the current state of each relay. By activating one of them we change its status on the database.
Every 5 seconds the card accesses the database and updates the status of the relays, therefore also of the relay that we have just changed.
The latency of 5 seconds seems acceptable to me for any home use (lights, heaters, etc.
The video: https://youtu.be/ltDijkHRFso
I thank my friend Rui Santos for the inspiration and the php and ino code from which I started
The banner ads on this page are annoying, but they allow us to pay server fees. If you click on one of them, you contribute
Pautasso Luciano


Categorie Articoli
Come-Trovare-Facilmente-l-Equivalente-di-un-Transistor
Corso-di-elettrotecnica-ed-elettronica-3-volumi
Libro-tutto-sull-audio---inglese
Libro-ELETTRONICA-FONDAMENTALE
Dove-acquistare-abbigliamento-risparmiando
Come-vedere-le-partite-sullo-smartphone
Come-difendersi-dagli-allegati-pericolosi-nelle-email
KEEPASS-un-posto-sicuro-per-le-nostre-PASSWORD
I-3-trend-estivi-del-2020-scopri-i-tagli-che-ti-stanno-meglio
Ultimi articoli
Come-copiare-1-TB-di-dati-su-WINDOWS APRI
Parallelatore-Camper APRI
Come-Trovare-Facilmente-l-Equivalente-di-un-Transistor APRI
Delaying-the-Switch-to-LPG APRI
Ritardare-la-commutazione-a-GPL APRI
OPTA-FINDER-ARDUINO-COMPATIBLE APRI
whatsapp-alarm-repeater APRI
Arduino_Template_Menu_Eng APRI
Arduino_Template_Menu APRI
Power-Supply-with-Current-Control APRI
Vantaggi_Alimentatori-Controllo_Corrente APRI
Camping-La-Secca-Moneglia APRI
Safety-Relays APRI
Rele-di-sicurezza APRI
Internal-or-External-Watchdog APRI
Watchdog-interno-o-esterno APRI
Ripetitore-di-allarme-su-Whatsapp APRI
Bufala-in-crosta APRI
Home-Automation-ESPeriment APRI
ESPerimento-Domotica APRI
Arduino-measures-liquid-level APRI
Arduino-misura-livello-liquidi APRI
finder APRI
LORA-english-version APRI
Pluviometro-LORA APRI
Pillole_di_Promessi_Sposi APRI
LORA APRI
promessisposi-riscrittura APRI
Arduino_crashes APRI
Arduino_si_blocca APRI